LSx: Clutch Hydraulics
Filed Under (Drivetrain, LS1) by Michael Pica on 28-09-2009
Tagged Under : bleeder, clutch, line, LS1, master, swap, t-56
If you’re swapping a T-56 6-speed into your 240 along with your LSx then you will need to replace the factory Nissan clutch master for something more beefy, along with that you’ll also need to make your own custom hydraulic clutch line as well as a custom bleeder line. This guide will walk you through the steps of constructing these parts as well as installing them. Keep in mind that this is only one possible way to accomplish this, like most custom swaps there are many different ways to get things done. This guide represents the most commonly used parts and method of accomplishing this.
Before you Begin:
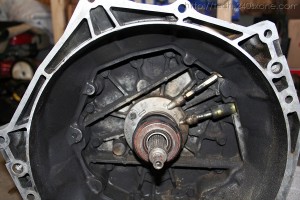
Before you start it’s important to note that the clutch slave actually wraps around the input shaft on the transmission. In addition to that the connections for the clutch line and the clutch bleeder can only be accessed from inside the bell-housing. This means that you need to install the lines while the transmission is disconnected from the engine. Also considering the positioning of the fittings on the clutch slave the lines must be installed after the slave has been attached to the transmission.
It’s also important to note that before you drop your motor and transmission into your car you should ensure that the transmission tunnel should be hammered out as much as possible to allow for the clutch and bleeder lines else they will get pinched between the bell housing and the tunnel.
Part Selection:
I wanted everything to fit and work like an OEM setup, I also went with the cheapest parts I could find without sacrificing quality or reliability. Towards that end I went with all stainless steel lines, equipment that is rated for pressure that exceeds what is needed for this application, and an a clutch master that seems to be the most commonly used with this swap. I’ve also read that you should stay away from Aluminum fittings when doing brake and clutch parts and go with Steel fittings due to how the fluid effects different types of metal. Though this seems rather silly since the clutch master and clutch slave are both made of Aluminum; regardless, all of the lines and fittings selected are steel.
Clutch Line:
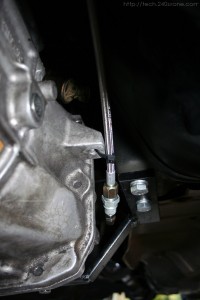
The GM factory clutch line has 2 pieces, it has a small adapter that connects to the slave then a quick disconnect fitting that allows you remove the line from the transmission easily for service, unfortunately due to space constraints you can’t use the quick release adapter, nor is there a fitting (that I know of) that allows you to build a custom line from this point on.
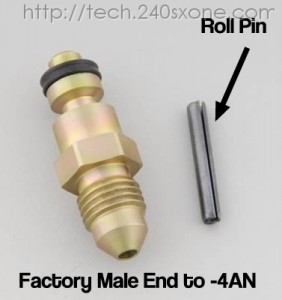
Moving one part closer to the slave there is a GM roll-pin fitting that connects the line to the slave. There are a couple of companies that make roll-pin to AN adapters, and they’re quite pricy. The Russel brand fitting is an -3AN size and the cheaper of the two, unfortunately it only comes in a pack of 2, so I just sold the spare off to someone else doing this swap and got some of my money back.
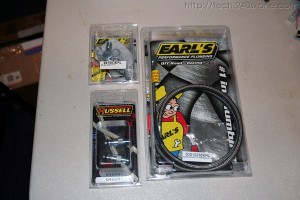
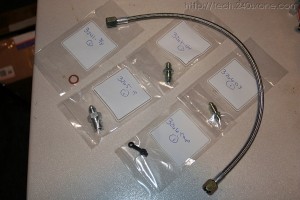
The parts I used to make this clutch line are specific to the clutch master I chose (which will be discussed in the next section) so if you go with a different clutch master then your part selection may need to be different. I bought these parts through Summit Racing but you should be able to source them through any store that carries Earl’s and Russel brand fittings.
- Adapter Fitting; Flare Clutch Fitting; AN Size -3; Male – RUS-640281
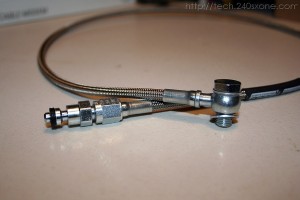
- Brake Line, Speed-Flex, Braided Stainless Steel, 36 in., -3 AN Female, 10mm or 3/8 in. Banjo, Each – EAR-63010236ERL
- Fitting, Adapter, Banjo Bolt w/Crush Washer 3/8″-24 Single, Steel, Zinc, Each – EAR-997503ERL
NOTE: the only other roll-pin to AN adapter I know of is a McLeod PN 673-139026 which goes roll pin to -4AN line, use that if you would rather go with a larger sized AN fitting, be warned though, it’s more than twice the price of the Russel fitting.
Again, the parts are listed in order of their construction with the roll-pin fitting attaching to the slave, then the banjo ended brake line and the banjo bolt. Both the brake line and the banjo bolt listed include crush washers, so you’ll end up with a couple of spares. The washers are to be sandwiched on either side of the banjo fitting; so when looking at the setup installed on the clutch master you see the bolt head, a washer, the banjo fitting, another washer then the clutch master.
Also I should note that the banjo bolt was too long and I ended up needing to cut it down a bit to seal properly into my clutch master. I know it would be too long when I ordered it but I was unable to find a shorter bolt, else i would have used one. I used a Dremel with a cut-off wheel; I believe I cut it down by 5 or 6 threads. I recommend assembling the banjo connection and using your judgment as to how much you should trim it down.
On the roll-pin side you might have to remove the GM factory adapter from the clutch slave. to do this you will have to remove the slave from the transmission in order to remove the roll pin. I ended up clamping the slave into a bench-vice and using a small screwdriver and a hammer to pop out the roll pin. there should be a small rubber gasket on the end of the adapter so make sure you remove that too before installing your new clutch line. Also remember you will need to install the clutch slave onto the transmission before you install the clutch line.
Clutch Bleeder:
The GM factory clutch bleeder will work fine, unfortunately it’s so close to the tunnel that the only way to bleed your clutch would be to cut a hole in your tunnel and bleed it from inside your car by the driver’s feet, not very optimal. So what we’re doing here is piecing together a remote bleeder so you can bleed the clutch without cutting up your car or getting brake fluid on your carpet. This setup isn’t really chassis specific, it should work fine whether you’re putting an LSx in an RX-7, a 240, a BMW or even if it’s still in the original GM vehicle.
The following parts are what I used to make my remote bleeder, everything was ordered from Pegasus Auto and the associated part numbers are included.
- Soft Copper Crush Washer, 3/8 inch (or 10mm) ID – 3241-3/8
- Male 10×1.5mm Metric Convex Seat to 4AN Male, Steel – 3265-44
- 18 inch Size 4 TFE Hose, Straight Swivels, Both Ends – 4-18-S-S
- Female 10×1.0mm Metric Concave Seat to 4AN, Steel – 3265-19
- 10×1.0mm Bleeder Screw – 3266-03
- Bleeder Screw Protective Cap – 3266-CAP
The list above is also in the order of construction with the washer at the top working to seal the line to the clutch slave. When constructing the line simply make sure all the parts are clean and dry and tighten everything down well. DO NOT use Teflon tape or any other sealing agent, the flares on the fittings are what creates the seal and introducing additional agents will actually hinder their performance.
Once the line is pieced together you can attach it to the slave. The bleeder attaches to the upper outlet of the slave. When installing it on the clutch slave you should sand down the surface that seals against the washer to make sure that it is flat and smooth. After sanding make sure you clean off any dust and that the slave is dry before you attach the bleeder line to ensure a good seal. Also remember you will need to install the clutch slave onto the transmission before you install the bleeder line.
The bleeder line can simply be zip-tied to an empty bracket on the transmission to keep it up and out of the way.
Auto to Manual Conversion:
Before you can install the clutch master you will need a clutch pedal and firewall cutout to Nissan factory spec. This means that if you’re swapping from a car that was originally a 5-speed you can leave your clutch pedal where it is and call it a day and move on to the next section.
If you’re swapping from an automatic (Like I was) then you will need to find yourself a clutch pedal and drill 3 holes in the firewall, one for the clutch master and 2 more for the mounting bolts. You will want to drill out the firewall from inside the car, and whether you have an S13 or S14 the pattern you need to drill out is on the firewall already which makes it easy.
If you’ve got an S14 you ‘ll also want to swap the brake pedal as well and do this before you do the clutch pedal, on an S13 you can take a hack saw and cut the pedal down then replace the rubber pad with a newer smaller one.
On the firewall cut out you’ll want to deburr the large hole in the center so it doesn’t cut into the clutch master boot. Test fit the setup to make sure everything works and before you put everything in place for good make sure you mask-off, sand down and paint the area that you cut out to keep it from rusting… and make sure you use rust-preventative paint too.
Finally you might consider hooking up the two clutch switches, the one on the bottom should be connected in-line with the igintion such that you can’t start your car unless the clutch pedal is depressed. This is needed if you plan on tracking the car, most sanctioned racing events will check that this switch works when they tech your car. The one on the top is for cruse control cancel and can be wired in line with the cruise control cancel switch on the brake pedal.
I should also note that in addition to the two studs that go through the firewall there is a bolt at the very top of the clutch pedal that should be installed, this is important as it adds stability to the whole clutch pedal assembly and is often overlooked. Its also handy because it will let you install your clutch pedal and hold it in place until your clutch master is ready to go.
I wont go into much more detail on this since there are lots of other considerations when swapping auto to manual and you owe it to yourself to look over a swap guide.
Clutch Master:
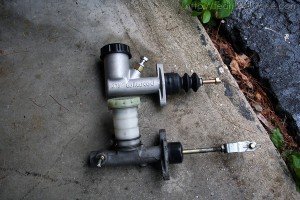
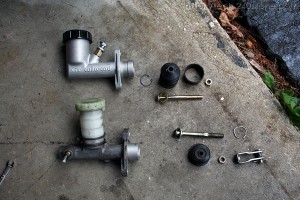
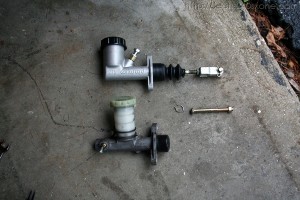
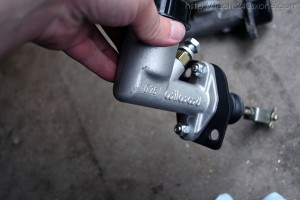
I used a Wilwood .75″ bore (PN: WIL-260-1304) master cylinder as my clutch master. It fits well, it looks nice and it’s well constructed. I chose it because it was a popular choice for others who have done this swap before and they seemed to have good success. Here is the Wilwood master compared to the original Nissan clutch master.
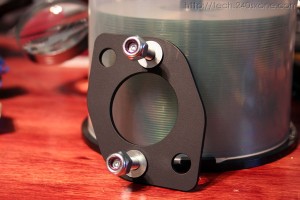
Most after-market clutch masters wont bolt up to the Nissan factory clutch pedal as is, the Nissan uses staggered bolts while most clutch master have a bolt pattern that is straight up and down. You will also need to find some kind of bracket to attach the clutch master to the firewall. I bought mine though Rigid Racing on SilviaV8. It is a very professional looking part and was reasonably priced. There are other brackets availble for this and other Cltuch masters but I felt this was the highest quality off-the shelf product availble.
The fork on the push rod and fork is different than most aftermarket setups too. To get around this you will need to get the push-rod assembly and pivot fork from from an original Nissan clutch master. You can get just this part through your local Nissan parts dealer for about $12. If you have an original Nissan clutch master then removing the rod is easy to do. Here’s the basic process for swapping the rod over.
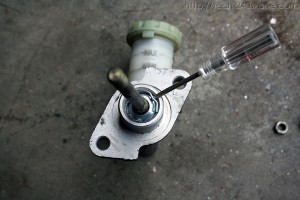
You can use a small screwdriver to pop out the retention ring on the Nissan master, the Willwood uses a proper snap ring.
Once the two are disassembled simply re-assemble the Wilwood using the rod piece from the Nissan. I would also recommend putting a dab of grease on the bottom of the rod, though there should be some there already.
The small metal clip that seals the boot against the rod on the willwood snapped off (it was kind of cheap) so I used a zip tie to replace it, I think it will actually hold better with the zip-tie than the original metal clip.
Finish up by boting up the adapter plate to the Wilwood and you now have a clutch master that you can pop on your 240SX as easily as the original Nissan one.
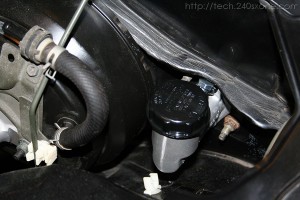
Above you can see the assembly bolted up to the firewall on an S14. Notice how close the banjo bolt is to the pinch weld, it clears but you will need to unbolt the clutch master slightly in order to bolt up the clutch line.
Don’t forget to hookup the fork pin to the pedal!
Putting it all together:
Before you drop your motor into your car I highly recommend pressure testing your whole clutch system outside your car, the last thing you want is to drop in your motor only to find out something isn’t tight enough and started leaking, only to have to pull everything back out again.
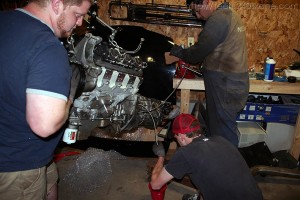
Just before dropping in my motor the master was put in a bench vice, the clutch lines hooked up, and the resovoir filled. I removed the fork and Using a piece of wood to push in the rod we bled the system and then used the clutch a couple times while someone looked ito the bell housing for leaks. It was a little extra work but the piece of mind was worth it.
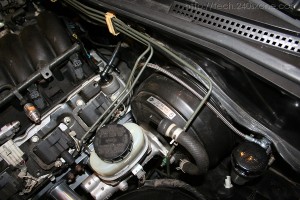
The clutch line is long enough to give you a few routing options, I opted to unbolt my brake booster slightly and running the line behind it and under the pinch-weld on the firewall and then down. I felt this helped clean up the engine bay a little bit.
