Headlights on your S13 acting up? One low beam or both out and same with the high beams? Before you go systematically replacing parts one by one you should check your headlight switch. With a little skill and patience you can repair your headlight switch.
-1st you’ll want to remove your steering column cover.
-Next remove the screws that hold the headlight switch to the column and unplug the connector.
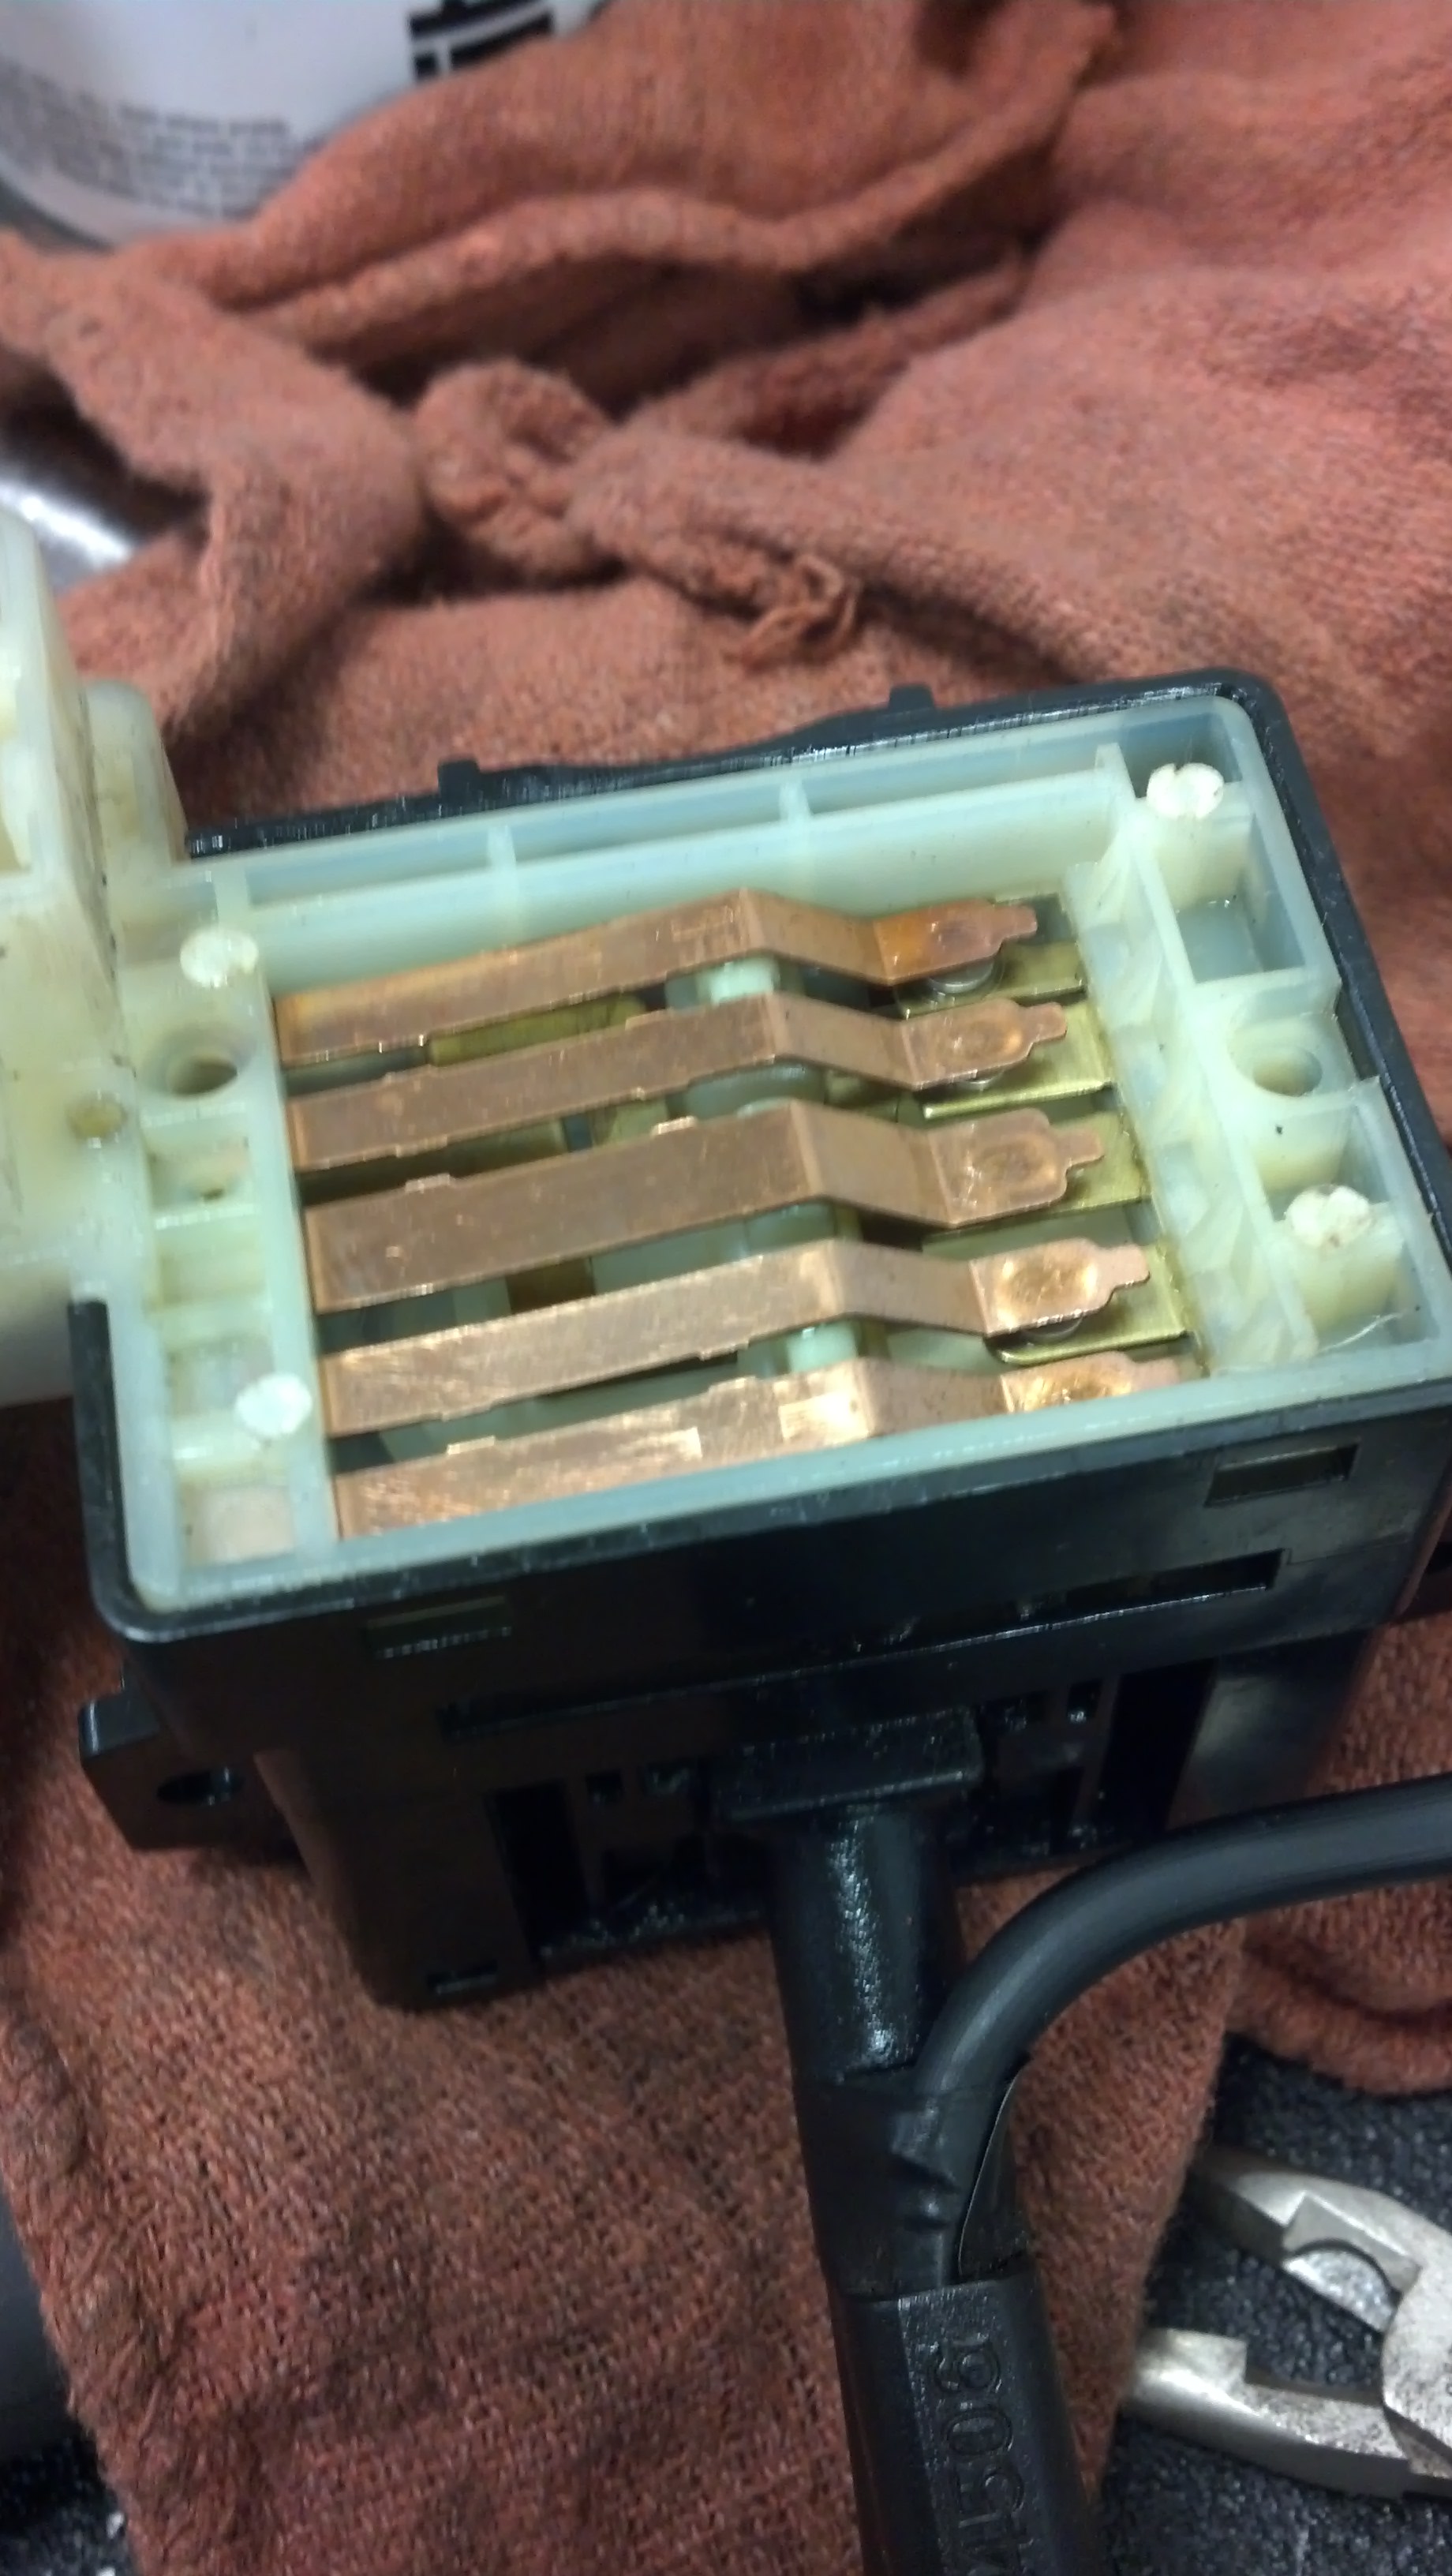
-Now that you have the unit removed you can start to open the switch backing. Remove the small screws from the back and using a very small screwdriver pop the white backing off of the switch.
-You’ll see 5 contact arms, as you turn the headlight switch knob to activate the parking, low beam and high beam lights the arms will move down to make contact. What your faulty one is doing is either not contacting or has dirty contact.
-Use the small screwdriver and clean up the contact surface and then click through the selections and make sure that only the proper ones move down when wanted and actually contact when needed. Bend the arms if needed slightly just make sure you don’t have the high beams down so far that they will contact while in park or low beams and the same for the others. It’s pretty easy to figure out click once 1 arm moves (parking lights) second click 2 arms move (left and right low beams) pull back or push forward and 2 more arms move (left and right high beams).
-After your adjustment carefully put the backing back on (Sucks to get it on right and will take some time) and re-install the switch and test it out. All done

When converting your S14 from the Zenki (early period) style front end to a Kouki (late period) style front end one of the components deemed necessary for the swap is the headlight brackets. These brackets attach to the upper and lower radiator supports at the front of the car and provide a location for the inner edge of the headlights to bolt to. Read the rest of this entry »
Filed Under (Exterior) by Michael Pica on 16-03-2011
Originally created by greenkouki for HIDPlanet, this has been re-posted here with permission. This guide has been formatted and embellished for clarity.
Read the rest of this entry »
Filed Under (Exterior, S13 Specific) by Michael Pica on 01-05-2010
If you’ve converted your S13’s pop-up headlights to fixed headlights from an S13 Silvia you probably realized that just about all the electrical connectors plug right in without any problem. The only exception being the fog lights. All 3 variations of the Silvia headlights include fog lights (Bricks, Dual Projectors, and Triple Projectors) The fogs are the inner most lamps on each of these headlight variations and they’re all wired the same. Thankfully they are also rather simple to wire up.
Read the rest of this entry »
Filed Under (Exterior) by Michael Pica on 10-09-2009
The Problem:
Ok so I wanted to buy kouki tails for my S14 since the day I brought it home. After finding what I though was a good deal on a clean set I open the box to find out they’re faded as hell… the black surrounds look Grey and almost purple in some light.
After the ’09 CIP meet and seeing nearly every set of kouki tails there looking faded to garbage it’s pretty clear that this isn’t a unique problem.
The Idea:
I’d used spay on Vinyl Die on plastics before to good success so I decided to test it out on the taillight and see how it goes. This is just generic stuff that I picked up at my local Auto parts store. It’s designed to repair or re-color interior pieces. Read the rest of this entry »