Whether you’re putting your car on an engine bay diet, trying to stick it to mother nature, or something else altogether (in my case I had a leaky EGR tube) removing the EGR system from a KA24DE is a fairly popular modification. In this guide I show you step by step how to remove it without having to tear apart your whole car in the process.
Before you Begin make sure you have everything you need and have read through this tutorial at least once. Once you start this modification your car will not be drivable until you finish so make sure you have plenty of time to get done what you need to get done. Also note that because this modification removes emissions equipment it is for off-road purposes only. I claim no responsibility for anything you do as a result of reading this guide, it is intended purely for educational purposes.
Parts Needed:
- “squid” type EGR block of plate
- Gasket Maker, silicone sealant (RTV) or similar
- 1 small vacuum cap or ~6″ of vacuum hose
- m24 x 1.5 pipe plug with crush washer(s)
Tools Needed:
- 1/4″ drive 12mm shallow socket
- universal 1/4″ drive u-joint (or 12mm 1/4 drive u-joint)
- 1/4″ drive 6″ extension
- 12mm wrench
- large 24mm wrench (or a metal saw and a shallow 24mm socket)
- Penetrating Oil (Kroil, Freeze-Off, PB Blaster, whatever you use)
- small wire brush
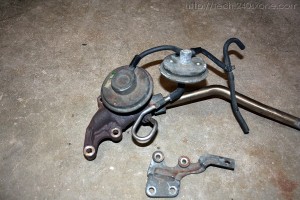
Above is what the EGR system looks like mocked up outside the car, take a good look at it because where it’s located in the engine bay it’s hard to see what’s what. Pay particular attention to the vacuum hoses.
The EGR system attaches to the car at two main points, one is on the exhaust manifold where there is a metal tube, about the size of a nickel in diameter, coming out the back of the header. This runs along the back of the motor to the intake manifold where the tube attaches to the EGR valve. The intake manifold curls around like a tunnel and the EGR valve sits inside this tunnel a the back. Then there is a control valve about the EGR valve attached with 2 vacuum lines and there are two additional vacuum lines coming out of the EGR control valve.
To remove the EGR system You will need to plug the connection in the exhaust manifold as well as the intake manifold connections. The exhaust manifold can be plugged with a pipe plug, or by welding shut a piece of the EGR tube. On the intake manifold side you will need a block off plate. There are two types of plates, a “squid” plate or a “house” or “diamond” plate. the squid plate is better since it will allow you to remove your entire EGR valve, the other style plate requires that you leave part of the valve on the car. I bought a squid plate because I’d rather have a cleaner looking engine bay and get rid of as much of the EGR equipment as possible. The two vacuum lines that you’re disconnecting will need to be run together.
Step 1: Unbolt the EGR Valve
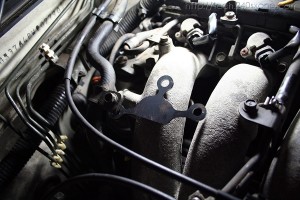
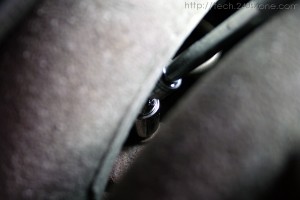
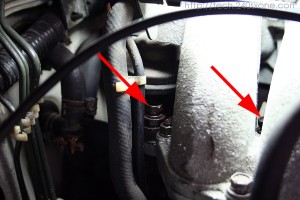
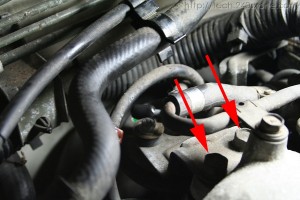
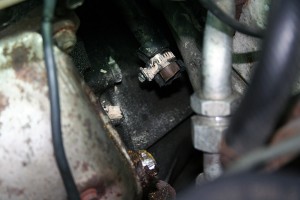
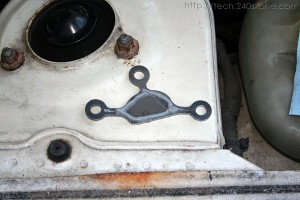
Here is the squid plate placed on top of the manifold showing roughly where the bolts are under the runners. One bolt is easy to get to since it’s not under the manifold, one is mostly easy to get to because it’s between two runners of the manifold… and the other one is a total pain in the ass because it’s DIRECTLY UNDER the last runner in the manifold.
I decided to tackle the hardest one first…. the one under the manifold.
I first sprayed down all 3 bolts with penetrating oil before I did anything else, this cleaned them a bit and hopefully loosened them up. The last thing I’d want to do is mangle the hard to get to bolt and have to pull the whole manifold off to fix it. Thankfully this is a spot in the bay that stays relatively clean.
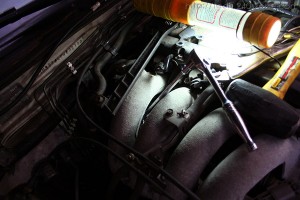
I then used a 1/4 drive shallow 12mm socket with a u-joint and a 6in extension (all craftsman FWIW), then a 1/4 to 3/8 adapter and my trusty ratchet. I used 1/4 drive hardware because that’s all that would fit. I used the 3/8 ratchet because I needed the torque. If you have a 12mm with a built in U-joint that might work better, the key is having the joint as narrow as possible and as low as possible, my 3/8 drive hardware was too big, even the 1/4 drive hardware barely fit and was only really big enough to break it loose.
Once the bolt was lose I pulled the ratchet off as well as the u-joint and was able to slowly turn it out using the extension like a nut-driver.
I used a magnetic pickup to remove the bolt once I had un-threaded it all the way.
The other two bolts are much easier to get to. The one between the runners you can use a 1/4 drive 12mm socket with an extension. and the one on the left you will need to use a wrench on since it’s under the valve and you cannot get a socket on it.
Step 2: Remove the EGR Control Valve
Before we can pull the EGR valve out we need to remove the ERG control valve. This is held on to the top of the manifold with 2 bolts. you’ll need to temporarily remove the bracket above to get it out.
In addition to the two bolts there is also a small plastic clip that holds a a line onto the bracket, as well as two vacuum lines going into the top of the control valve and one directly out the bottom. All of these will need to be removed as well.
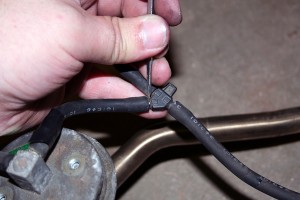
If you’re having trouble with the vacuum lines pry them a bit with a flat head screw driver (shown below) while you twist/wiggle the line. If they’re really stuck you can just cut them, though I would not recommend it.
Once all of these items have been disconnected the EGR Control valve should come right out without much fuss.
Step 3: Remove The EGR Tube
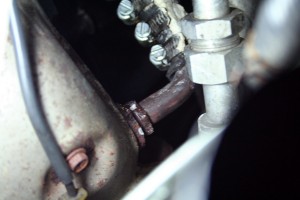
The EGR tube connects to the back of Exhaust manifold. It has a 24mm pipe-nut that holds it in place. If you happen to have a big-ass 24mm wrench then blast it with penetrating oil and see if you can break it loose.
I didn’t have a 24mm wrench, my adjustable wrench wouldn’t grip the nut tight enough, nor did my vice-grips allow me to torque on it enough to break it lose. What I did instead was cut the pipe with a saws-all and then use a 24mm socket on a breaker bar.
The socket and breaker bar had to be put on from UNDER the car due to the AC line and pinch weld on the firewall above the manifold. Once they were on though the nut came out with a little muscle.
I would recommend trying to remove the tube without cutting it, a lot of people like to keep their EGR system in-tact, and while you might not have any use for it, the equipment does cost some good money from Nissan and you could likely re-sell any equipment you remove, so long as it is in good condition.
Step 4: Remove the EGR Valve
Now that everything has been unbolted and the control valve has been removed you should be able to remove the rest of the EGR assembly. The area behind the intake manifold is tight due to all the other lines and brackets in that area. You will need to push things out of the way and play with different angles to get the EGR valve out. If you’re leaning over the passenger’s side the car I turned the valve assembly counter clockwise so the flange with the 3 bolts you removed earlier was pointed up and squeezed it out that way.
If you’re still having trouble you might try unbolting the EGR tube from the valve side, or unbolting the EGR valve from the 3 bolt flange. I didn’t need to do this to get it out though.
Once you’ve removed all the EGR equipment bolt back up all the brackets and put back any hoses you may have moved trying to get it out. Do this before you forget where everything goes.
Step 5: Reconnect the Vacuum Lines
If you removed everything as shown in the first picture of this guide then you will have two open vacuum ports.
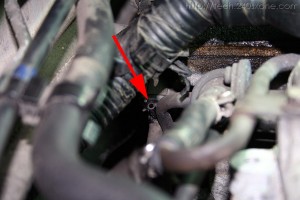
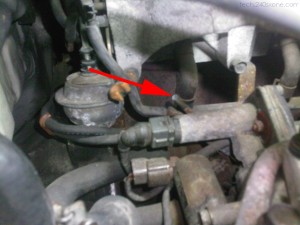
One port directly behind the valve cover coming out of the EGR/EVAP control cylinder.
The other port is pointing upward at an angle right next to where the 3-bolt flange use to be.
These two ports need a hose to connect them. DO NOT CAP THEM OFF. If you do not connect them with a hose you may experience idle issues due to your EVAP system not functioning properly.
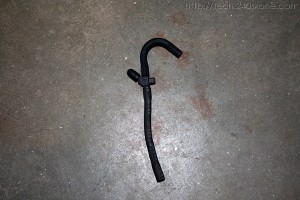
If you have vacuum hose to use simply cut a length of about 6 or 7 inches and connect them. I would recommend using new hose as the original hose is likely brittle and weak. If you don’t have new hose to use you can make use of the hose that you removed but you will need 1 vacuum cap. Here is the original section of hose with a cap over the split that used to go to the EGR valve
If you don’t even have a vacuum cap you can leave a section of hose in there and plug it with a screw. I would highly recommend just going to your local auto parts store and buying some hose though, I got 10ft for $4, they would probably just GIVE you 6″ of it.
Step 6: Plug the Exhaust Manifold
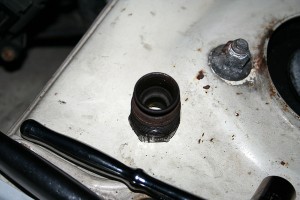
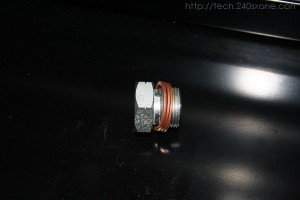
To plug the exhaust manifold you’ll need an m24x1.5 threaded plug.
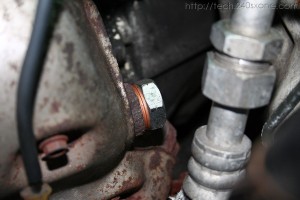
A plug will be tapered and can be threaded in easily. I used a bolt that had been cut down with a crush washer to help seal it
If you can’t find a plug then you could cut a section of the tube and weld it shut, so long as the tube nut is still good you can put it back on the car. Or you could also get yourself a new exhaust manifold without the EGR bung.
If you’re going for stealth the best thing would be to use a pipe plug with an Allen head indent.
Step 7: Install the Block-off Plate
The final step in the process is to install the EGR Valve block off plate.
Before you can install the plate you’ll need to make sure the mounting surface is clean, the old 3-bolt flange had a gasket on it. make sure you get the gasket off and clean off the surface as best as possible. Use a wire brush and your favorite parts cleaner. I recommend shoving a damp rag into the hole to make sure you don’t get dust and dirt down into the intake manifold (just make sure you can get the rag back out).
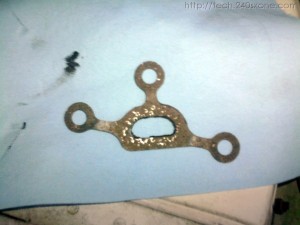
Take a look at the gasket and notice that the sealing surface is a good 1/4 inch wide. take your favorite gasket maker or silicone sealant and lay a patch the same width of the gasket wall around the center of the block off plate.
The above picture is an example of what NOT to do. The bead I laid down wasn’t thick enough, I had problems getting my block off plate to seal the first couple of tries. That and I didn’t do a very good job cleaning off the mounting surface on the manifold.
Once you’ve placed the sealant on the plate carefully place it down on to the mounting surface through the back of the intake manifold being careful not to touch the sealant side to anything else in the engine bay.
Place the bolts through the holes and thread them in a couple of turns so that they’re NOT tight, just holding the plate in the proper position. you can do this by hand through the back of the intake manifold. Once all three bolts are in then thread them all in a couple of turns at a time one by one. The goal is to make sure you’re applying equal pressure across the plate to ensure a good seal. Go finger tight at first then once you need a driver go a half turn of each bolt at a time until they’re all full tight.
For the two bolts towards the front and rear of the engine you can use a 1/4 drive 12mm socket and a 6 inch extension, for the one in the middle directly under the runner you will need to use a 12mm wrench.
Dealing with sealing issues on the block off plate:
I eventually used my dremel with a flex shaft attachment and carbide wire brush attachment to clean off the mounting surface to a shiny metal and then laid a nice thick bead of Great Stuff Gasket maker on the mounting plate and that seal was very successful.
I’ve heard from others who have attempted this that they just slopped on some RTV over the dirty mounting surface and had no problems, your results may vary, just know that the placement and thickness of the bead you lay down is extremely important to getting a good seal.
Also make sure your sealant has adequate time to dry before you start your car, or you’ll suck it right down into your intake. Check the label for drying time. It will take longer to dry in cold or humid weather.
After the Install
Once you’ve completed everything above and the sealant on your block off plate has sufficiently dried. Start your car up.
While your car is running place your hand behind the exhaust manifold plug you installed and feel for escaping exhaust fumes.
Also while your car is running place your hand around the back of the intake manifold, listen for the sound of rushing air and check the vacuum line you installed for leaks. Also run your finger lightly around the parameter of the EGR block off plate and listen/feel for air leaks. Both the vacuum line and the EGR block off plate will be sucking in air if there is a leak. lightly brushing your finger over the sealing surface will change the pitch of the rushing air sound if there is a leak where your finger is. If there is a substantial leak in the vacuum hose or block off plate it will also effect your cars idle. Checking the plate is difficult because you will also be feeling a breeze from the engine fan.
If you have a leak in any of these areas, try to determine where exactly it’s happening, shut your car off, remove the part and then take appropriate action to fix it.
If all goes well you should now have a cleaner engine bay and smoother running exhaust and intake manifolds.
