LSx: Power Steering Pump Reducer Install
Filed Under (Engine, LS1) by Michael Pica on 08-02-2010
Tagged Under : LS1, power steering, pulley, Turn One
The Problem:
Many people who swap an LS series motor into their 240SX or RX-7 tend to complain that the power steering pump is simply too powerful for the chassis. The steering ends up feeling “disconnected” since there is almost not feedback though the steering wheel.
The pumps run notoriously hot too, enough such that later model LS equipped vehicles come standard with a power steering cooler.
TurnONE:
There is however a company that specializes in Performance Power Steering Pumps; TurnONE. I heard about them after I read an article on GM High Tech Performance of their replacement pump and pulley products. Their pump not only fixed the overheating issue, but it improved steering feedback, improved the engine performance by several hp across the board.
I called them up explaining that my 99Vette LS1 was going into a Nissan and I wanted to know if they had a larger pulley that would effectively reduce the pump speed. I was told that a new pulley wouldn’t really solve my problem and rather than spending money on a whole new pump I could get the reduced flow and improved feedback I was looking for by simply replacing the output nozzle with one that had reduced output. This product isn’t listed anywhere on their site, you’ll have to call to order it. The reducer ran me about $40 shipped, which is half the price of a new pulley, and about 1/5th the price of one of their high performance pumps.
Tools Needed:
- Power Steering Pulley Remover/Installer Kit (can be rented from Autozone for $30)
- torque wrench
- 22mm socket
- 14mm, 17mm, 21mm open end wrenches
Installation:
1. Remove parts to get at the pump
Because of the location of the output nozzle you’ll need to remove the pulley from the pump. So that also means you’ll have to remove the accessory belt and disconnect the high pressure power steering line from the pump as well. I hadn’t installed these pieces on my car yet because I knew I would need to install the reducer first. Also depending on the placement of things in your engine bay you may have to remove other items too, for instance I removed the intake.
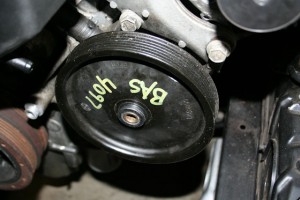
2. Remove the Pulley
The next thing you’ll want to do is to remove the pulley. The removal tool hooks onto the snout of the pulley with 2 sleeves.
once both sleeves are placed on there is a collar that slides over them to hold them in place.
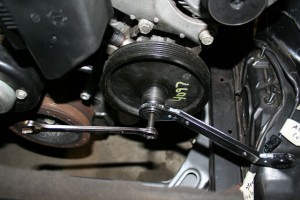
Using a 19mm wrench to hold the base and a 17mm wrench at the tip; tightening the bolt will “pull” the pulley off of the shaft.
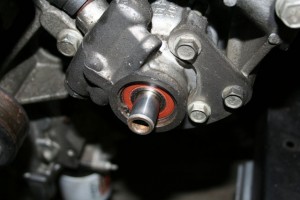
3. Remove the old Nozzle
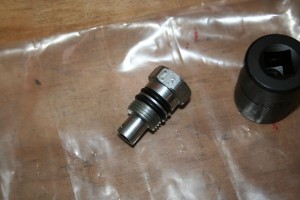
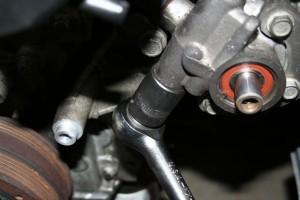
Once the pulley has been removed you can remove the old high pressure nozzle. This requires a 22mm socket, or wrench. Depending on the placement of your power steering pump you may have to remove other things too, I removed a near by idler pulley to give my ratchet some breathing room.
Be careful once the nozzle is almost out, it’s spring loaded and you’ll have a stopper and spring fly out of the pump once the nozzle is removed.
4. Install the new Nozzle
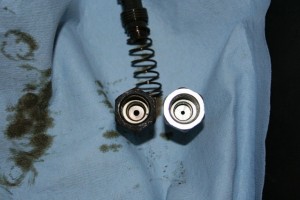
The difference between the original GM nozzle (left) and the new Turn One nozzle (right) is pretty clear.
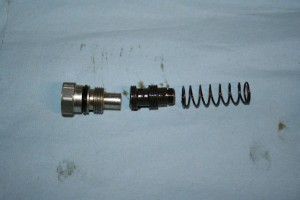
Make sure you place the spring and stopper back in the pump before installing the nozzle, if you lost track this picture will show you the order and position required for re-installation:
With the stopper and spring back in place tighten the nozzle back down. Use your torque wrench and torque it down to 55ft-lbs.
If you need to re-install a near-by idler pulley like I did, than that will need to be torqued to 18ft-lbs. Also most accessories require their bracket bolts are torqued to 38ft-lbs.
5. Re-Install the Pulley
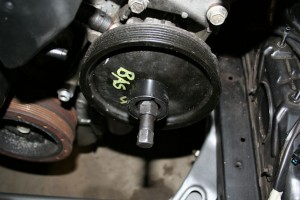
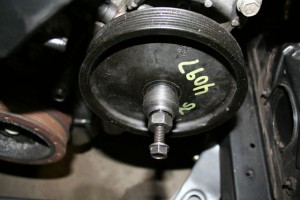
To get the pulley back on you’ll have to use a pulley installation tool, this is nothing more than a large bolt with a large pusher nut. Turn the pusher so it’s up near the head of the bolt then place the pulley on the bolt like a giant washer. Thread the bolt into the center-bore of the pump shaft. Thread the bolt all the way in then turn it back out once or twice. Then hold the bolt in place and turn the pusher until it’s snug against the pulley, make sure the pulley is lined up properly with the shaft.
Use a 21mm wrench on the pusher and a 14mm wrench on the bolt head. You’ll want to hold the bolt in place and turn the nut, opposite of what you did when removing the pulley.
6. Put everything back together
You’re pretty much done, just re-install anything that removed to get to the pump and enjoy your improved steering response.
